

The Muhimbi PDF Converter for SharePoint has had the ability to apply watermarks to PDF files for quite some time. However, this really was only available to power users as it required either interacting with the Conversion Web Service directly or running custom code using our Workflow Power Pack.
Fortunately applying simple as well as complex watermarks is now within reach of all our users as, starting with the 4.0 release, we now include a free set of SharePoint Designer Workflow Actions that allow watermarks to be applied with a minimum amount of hassle.
What follows is an abstract from the PDF Converter for SharePoint user guide. For more details please check out chapter 5 as well as the Watermark Field Matrix Appendix.
The Muhimbi PDF Converter for SharePoint contains a powerful watermarking engine that can be used to add watermarks to pages as well as adding headers, footers, page numbering and other recurring items. Multiple watermarks can be applied to the same page and watermarks can be applied to page ranges, page intervals or certain page types such as portrait or landscape.
In addition to Document and HTML Conversion workflow actions, the Muhimbi PDF Converter also comes with a number of Watermarking related workflow actions for SharePoint Designer 2007 and 2010. These workflow actions allow elements such as text, rectangles, images, PDF files as well other shapes to be added to a document either in front of or behind the document’s content.
Note that these watermarks can only be applied to PDF files, so if for example an MS-Word file needs to be watermarked then it will need to be converted to PDF first in a separate step.
Each separate watermark workflow action is applied to the document separately. If multiple watermarks need to be applied in one go then you may want to have a look at part 2 of this series, Composite Watermarks.
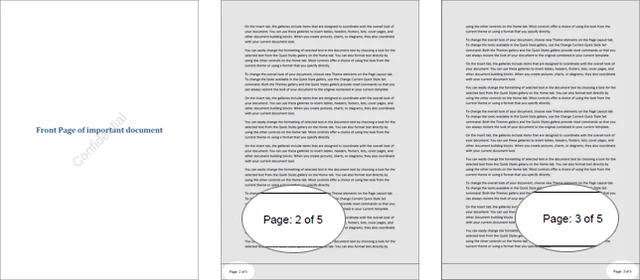 An example of what is possible, apply watermarks as well as page numbering to documents
The individual workflow actions are self-describing, but the following elements require special attention:
this document: The document to apply the watermark to. For most workflows selecting Current Item will suffice, but some custom scenarios may require the look up of a different item. You may also want to check that the file type of the document is ‘ pdf’ before trying to apply a watermark.
this file: The name and location of the watermarked file. Leave this field empty to overwrite the source file with the watermarked copy. Enter a path, including the Document Library and any folder names, to write the watermarked file to a separate location. E.g. “ shared documents/watermarked files/confidential.pdf”
List ID: The ID of the list the watermarked file was written to. This can later in the workflow be used to perform additional tasks on the file such as a check-in or out.
Item ID: The ID of the watermarked file. Can be used with the List ID.
The Text watermark action
This workflow action can be used to apply text to the foreground or background of one or more pages in the PDF file with full control over the font, style, size and colour.
The SharePoint Designer workflow action is named Add Text watermark to PDF and the parameters are as follows:

The text stored in the content field may contain embedded field codes such as the date or current page number. For details see section 5.5 Embedding field codes in the Text element in the User Guide.
SharePoint Designer lookup variables are also supported, which makes it possible for dynamic information stored in workflow variables, or in the Item’s columns, to be embedded in the watermark.
The RTF watermark action
The RTF watermark allows simple RTF encoded text to be used as a watermark. This allows more control over the look and feel of individual words in the watermark at the cost of added complexity.
An example of valid RTF is as follows:
{\rtf1\ansi{\fonttbl\f0\fswiss Helvetica;}\f0\pard
This is some {\b bold} text.\par
}
The SharePoint Designer workflow action is named Add RTF watermark to PDF and the parameters are as follows:

Note that unlike the Text watermark, the RTF watermark does not support Muhimbi’s embedded field codes. However, SharePoint Designer lookup variables are fully supported to make it possible for dynamic information stored in workflow variables, or in the Item’s columns, to be embedded in the watermark.
Please note that due to a bug in SharePoint 2010, lookup variables in RTF text may have unexpected side effects. SP2007 works fine. We are working with Microsoft to fix the bug in SharePoint.
The Image watermark action
Use the Image watermark to add common image types (BMP, JPG, GIF, PNG, TIFF, WMF, EMF / EMF+) as a watermark to a PDF document.
The SharePoint Designer workflow action is named Add Image watermark to PDF and the parameters are as follows:

The image at this path parameter expects the full path of the image relative to the current site, e.g. ‘ shared documents/images/company_logo.gif’.
The PDF watermark action
Existing PDF files can also be used as a watermark. This could be a dynamic file that is generated from, for example MS-Word, and then converted to PDF using the Muhimbi PDF Converter. Alternatively this could be a static PDF file that has been generated manually.
The SharePoint Designer workflow action is named Add PDF watermark to PDF and the parameters are as follows:

The pdf file path parameter expects the full path of the PDF name relative to the current site, e.g. ‘ shared documents/static watermarks/company_logo.pdf’.
The Rectangle watermark action
A simple rectangle can be added as a watermark using the Add Rectangle to PDF workflow action. The parameters are as follows:

The Line watermark action
A line can be added as a watermark using the Add Line to PDF workflow action. The parameters are as follows:

The Ellipse Watermark action
A circle or ellipse can be added as a watermark using the Add Ellipse to PDF workflow action. The parameters are as follows:

The QRCode Watermark action
For details about adding a QR Code watermark, see this blog post.
Continue to part 2, Composite Watermarks.
Labels: Articles, pdf, PDF Converter, Watermarking, Workflow